yes. - Scrapbook Circle May

Friday, May 29, 2015

Another project using the May Scrapbook Circle 'Hello Sunshine' and the 'Hello Love' Add-on!
I'm a day late in posting this, but this sweet kid with my daughter had a birthday and is
one of my favorite little people!


This was just a fun, coming together real quickly LO that was done after
completely DT assignments.  And it turned out to be one of my favs.


I am in love with the Pink Paislee acetate overlays, especially this gold citrus slice piece.


I added piles of layers and mists, random stitching and embellishments, but the photo is still
dominant because of the colors in it.  The black of the Scrapbook Circle glitter phrase sticker
is such a stark contrast that stands out as well, adding some India ink only ties them all together.


Thanks for stopping by, hope everyone has a great weekend and a
happy happy birthday to this special little man!!


Best Story - Come On Get Crafty May Sketch

Wednesday, May 27, 2015

Hi there!  Still have a couple more layouts to post from May projects.
This is the May Sketch Challenge for Come On Get Crafty.


This is the sketch below and the original Blog post with the other DT members pages is HERE.


Sometimes a sketch is more creatively therapeutic for me, no stress about planning a
page LO and I can just concentrate on the photo and documenting the memory...


I used a light kraft cardstock for the background and then a wide variety of products


Thanks for checking it out!


hello LOVE - Come On Get Crafty | Something Old, Something New

Friday, May 22, 2015

Hello there!
I am excited to share a fun layout I made using wood veneers from older and newer collections.  I used a mix of dark stained Crate Paper wood and Dear Lizzy American Crafts pieces that I washed with a layer of gesso.  I combined those with some new Basic Grey wood veneers that I also painted white.
 
 I was inspired by the woven paper heart my son had made for me and decided to use two papers cut on a diagonal.  I sprinkled the wood veneers in an angle from the top left down to the right bottom corner, layering them over tags I watercolored & stamped.  
I adhered some patterned paper under the center 'LOVE' tag to make a diagonal line in the opposite direction, tying the pinks and reds together. 
I love the colored wooden beads from Pinkfresh Studio and all the various sizes and colors of the wood veneers.  I have so many and don't use them enough, so it was fun to load a page full of them! 
 Thanks for stopping by the Blog today!  I hope this inspires you to get your wood veneer pieces out and create something!  Have an amazing day!


create - The Crafter's Workshop DT May

Thursday, May 21, 2015

Hi there!  I had my second post for The Crafter's Workshop yesterday and shared this LO.
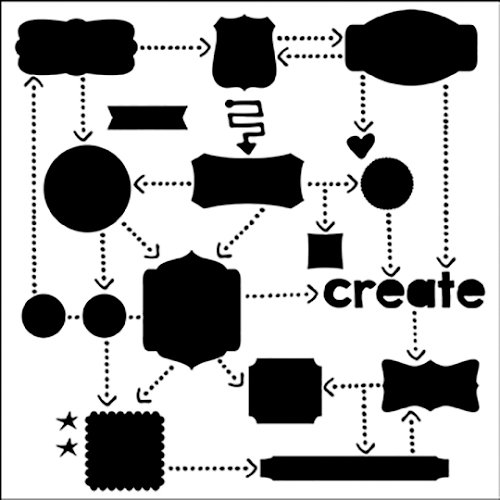
After sifting thru all the new stencils, I knew I HAD to use this one called 'Flow Chart'
to document my journey into Art Journaling!
create_TCW_May 2015 final
I just love the graphics, the scale and obviously the word 'CREATE!'
The Crafter's Workshop - 12 x 12 Doodling Templates - Flow Chart
I started with a photo of some text play from my journal and the 12x12 'Flow Chart' stencil.
create_TCW_May 2015 (8)
create_TCW_May 2015 (13)
I am a little obsessed with ombre colors and this allowed me to use lots of mists while keeping
the color palette to just a few tones.  I started with the darkest color at the top and worked
my way down, holding the mist farther away towards the bottom of the page.
create_TCW_May 2015 (14)
After the misting dried, I used black distress ink to stencil some of the numbers and postmark
from the 'Mini Ravenscape' stencil over a few of the misted blocks of color.
create_TCW_May 2015 (20)
create_TCW_May 2015 (23)
I used this delicious gold embossing paste over a couple words from the
'Mini Word Association' stencil to add some texture.
create_TCW_May 2015 (26)
create_TCW_May 2015 (38)
I punched a few pieces of patterned paper to lay over a couple of the color blocked areas as well.
Finally, I layered some more patterned paper, tracing paper and gold thread under my photo
and tucked in a couple other embellishments.
create_TCW_May 2015 (40)
create_TCW_May 2015 (41)
Some doodling, washi and black India ink splatters finished my page!  I know this is a
stencil that will be getting lots of use!!
Thanks for stopping by the Blog today!  Hope you are inspired to create and have an amazing day!

The Crafter's Workshop Stencils used:
 Flow Chart - TCW508
Mini Word Association - TCW527S
Mini Ravenscape - TCW529S


REPORT TODAY - Scrapbook Circle May Sketch

Tuesday, May 19, 2015

 I you are looking for the Anniversary Blog Hop, click HERE!

I wanted to share my take for the May Scrapbook Circle Sketch challenge using the
'Hello Sunshine' main kit and the 'Hello Love' Add-on.


One of my favorite aspects of a sketch is the suggestions of how many photos to use.
That is the first step I take and it usually flows from there!  This is the sketch below or
you can get out the original post and how the other DT members pages turned out HERE


After deciding to use these 2 photos of my son working his "book report poster" I chose
the ruled paper and used a notebook edge punch to add a school feel to it.  I also used the
photos to help chose the color palette of teals, greys and black with a splash of yellow.


I adore the Kraft tags from Amy Tan that have white ink doodles on them.  


As usual the monthly sketch was my first LO to create after sifting thru my kit.  It jump
starts my creative mojo and generates lots of ideas for using the other pieces of the kit!


Thanks for stopping by today!  Hope you have an amazing day!


Scrapbook Circle Anniversary BLOG HOP!!

Monday, May 18, 2015

Hi there everyone!!
This month we are celebrating Scrapbook Circle's 9th Anniversary!

To celebrate, this week we are doing a blog hop around to the design team members' blogs to showcase all the fun things we have created with the May Hello Sunshine Kit.


The hop starts at the Scrapbook Circle blog.
Comment along your way while visiting the other team members' blogs. Each comment will be one entry in a
random drawing where we will be giving away FIVE May Hello Sunshine Kits...five kits!  Hello...?!!

This is the LO I created layering several of the Pink Paislee Citrus Bliss Insta embellishments.


I used one of the frames layered with a transparency for my journaling.  Another one was for the title (there were three even though the photos only show 2) and then as mats for my photos.  I used lots of the Scrapbook Circle exclusives from the kit, including the foil cards and the glittered phrase sticker.


I added lots of other embellishments...the more the better on this page!  Finally, I stitched 
thru all the frames adding texture and an interactive element for the journaling.


That's it for my page!  We hope you feel inspired today!
Comments close at midnight PST on May 21.
We will post the winners on the Scrapbook Circle blog on May 22.


Next up is the awesome Gina Lideros!!

As a reminder, here is the order for the blog hop:
Birthday Blog Hop
May 18 - May 22
                >>  Jenni Calma - http://papercardinal.blogspot.com << (you are here)

Scrapbook Circle - Creative Team Member Interview

Thursday, May 14, 2015


Scrapbook Circle is celebrating it's 9th anniversary this month!
The DT members were asked to create a layout of our choice using the May Hello Sunshine kit
and to answer a few questions about our process and the page we created.

This is my project and the Q&A that was posted this week!


Q: Tell us about your scrapbook page. What does it mean to you?
A: The photograph on my page captures the light through our windows den at sunset.  The leaded glass cast the most amazing light refractions across the ceiling and walls.  This scrapbook layout means a lot to me because it documents all the hard work my husband and I have done in our home!  As architects, and sometimes frustrated architects, we use our home as our creative outlet.  We have almost finished renovating our retro mod ranch from top to bottom over the last 8 years.  After seeing this amazing dark wood grain paper from Chickaniddy Crafts I knew I wanted to document some piece of our house.  The name of the paper is appropriately called ‘Weekend Wonder!’


Q: What is your favorite, go-to technique when creating your pages?
A: I love layers and layering…the more the better!  It is a way for me to add lots of color and details to draw you into a page.  I almost always sew parts of the embellishments or paper to the background.  I love the subtle texture sewing adds as well as permanently adhering those pieces to the page.
Q: What’s the first thing you do when your kit arrives?
A: The first thing I do when my kit arrives is do a happy dance! Winking smile  After that, I sift through all the papers and sort them by the pattern I will most likely use.  Obviously, having the extra paper kit helps make this easier.  I also print out the exclusive monthly printables on white cardstock to keep with the patterned paper.

Q: If you could design the next Scrapbook Circle project kit (like this one, or this one),
what would it be?
A: I would LOVE to put together a kit, but it would be so hard to narrow things down!  I can’t wait to see more of the new Dear Lizzy ‘Fine & Dandy’ collection…just looking at it makes me smile.  I am super excited about the new Project Kits that are being offered and would love to put one together for party décor or art journaling!

Q: What do you love most about Scrapbook Circle?
A: Scrapbook Circle holds a special place in my heart because I was an avid subscriber before being on the design team.  After doing lots of research before committing to a monthly kit subscription, I loved the diversity and focus that Scrapbook Circle has without being overly complicated.  The DT and subscribers are laid back, talented and most importantly supportive!

--------------------------------------------------------------------------------

Thanks for stopping by and letting me share a peek into my creative process!
Have an amazing day!


Come On Get Crafty Product Showcase - Pinkfresh Studio

Wednesday, May 13, 2015

Happy hump day everyone!  Today I am sharing a LO on the Come On Get Craft Blog using new Pinkfresh Studio die cuts.


I used Pinkfresh Studio patterned paper to tie in the fun graphic hearts, rainbows & stars.  I love the
colors in this collection and this photo of my daughter was strong enough to stand alone, even with all the embellishments and gold foil!  I did add a layer of gelatos under the embellishment cluster,
to try to match the color in the circle in the patterned paper.


I layered the die cuts on both sides of the photo, mostly on the right side, and used lots of stitching to tie it together.
I did add a couple Amy Tangerine stickers which worked perfectly with the Pinkfresh colors & patterns.


   This is one of those pages that doesn't really need journaling, to me, at least.
It is such a simple, sweet photo that the phrases and embellishments say what I would have.


Thanks for stopping the Blog today!  Have an amazing week!

keeper - The Crafter's Workshop DT Debut!

Monday, May 11, 2015

Hi there!  This is the my first post as part of the new Design Team at The Crafter's Workshop!
Yay!  I am super excited to share a layout I made using 3 different stencils and 3 different mediums-
 spray mist, Distress Inks & modeling paste.
keeper_TCW_May 2015 final
For my first project I wanted to use a couple of my favorite stencils.  I wanted to use the
'Number Collage' stencil since this is a layout about long friendships.
I used the large 'Confetti' stencil with some spray mist so the splatters would draw
your eye from the photo up to the top of the page.
keeper_TCW_May 2015 processkeeper_TCW_May 2015 process (7)
I used washi tape to mask off top of the cardstock.  I held the stencil
in place and used Distress Inks in a range of greens and blues blending
them together as I moved it across the page.
keeper_TCW_May 2015 process (11)keeper_TCW_May 2015 process (15)
Finally, I used the irregular solid circles from this 12x12 stencil,
'Well Rounded' to add some texture and focus to the area I planned to place my photo.
keeper_TCW_May 2015 process (16)keeper_TCW_May 2015 process (20)
I tinted the white modeling paste with silver paint and mixed it in a plastic container.
If there are left overs, I can save it for another projects.
keeper_TCW_May 2015 process (21)
I used some patterned paper and a few other embellishments to cluster
around the photo.
keeper_TCW_May 2015 (12)keeper_TCW_May 2015 (6)
I hope this inspires you to combine stencils, mediums and techniques
on one project! Thanks for stopping by the blog today!


Stencils used:
Proudly designed by Mlekoshi playground