#CUZLUV - Paige Evan's Collection - Pick Me Up!

Tuesday, February 20, 2018

Hi!  I am sharing a layout I created today using the new Pink Paislee collection from Paige Evans, ‘Pick Me Up.’  I won the ENTIRE collection from a GiveAway Paige had on Facebook.  And I mean, ALL the goodies; Thickers, stickers, washi, papers, stamps, rub-ons and on & on.

This is the first project I used with my haul, and the first layout I made just for me, for fun, not for a team project in such a long time.  It was so nice and easy to be inspired with the colors, patterns and embellishments.


I used an Instax photo I printed of my daughter and youngest niece that I printed in black & white.  I started stacking papers and die cuts to create a very colorful cluster to contrast the black & white of the photo.


Using the diagonal pattern from the 6x6 paper as a guide, I added some machine stitching across the background cardstock.  There are also some super cute embellishments, like sequins that have adhesive, making it so easy to add them!


I finished up the layout with a small embellishment cluster at the top right corner.  I also mounted the entire background piece onto a piece of navy patterned paper and added some gold splatters!


Thanks for stopping by the Blog today!  And thanks so much to Paige Evans and Pink Paislee for the amazing gift of gorgeous products that are the perfect Pick Me Up!
Have a great week!


Home Decor Project - The Crafter's Workshop February 2018

Monday, February 12, 2018

Hello friends!  Grab a cup of coffee and get cozy for my project featuring a new stencil and new mediums from The Crafter’s Workshop.
For this home decor project I used this stencil just released a few weeks ago along with 4 of the brand new metallic pastes.


The Crafter’s Workshop provided me with some product to create this project.  The opinions I share are solely my own.


I bought this wood tray with a steel frame and handles at a local craft store.  I thought the rustic look would be perfect for using one of the newly releases stencils that are perfect for home decor.


In preparation for using the stencil, I trimmed about 1/4” off the top end to fit flat inside the frame of the tray.  I taped it in the center of the tray using masking tape and also masked off the top portion of the coffee cup so I don’t mix the pastes.


I planned to use these 4 metallic pastes in a gradient pattern from this light Champagne Gold to the darker Copper Penny Molding Paste.


Next, I used the color Antique Gold.  I wanted to let the Champagne Gold paste dry a bit before pulling up the masking tape, so I jumped ahead the third section of color I planned.  It is so perfectly named too...it does look like an antiqued finish.


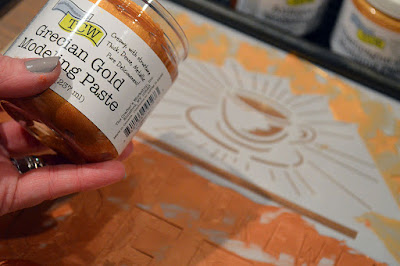
Then I went back to the coffee cup and used the Grecian Gold paste providing the perfect transition between the other shades of gold.


Finishing up the design with the Copper Penny paste at the bottom, I pulled off the masking tape and then the stencil itself.


I love the way the stencil itself looked with the paste all over it too!


Below is the finished product!  I love the way it turned out.  Such a fun way to customize something for a unique gift!


The stencil kept the design nice and crisp and the metallics have the perfect amount of shine.


Thanks for stopping by today to share this fun project!  I hope it inspires you to find a way to personalize your own home decor or something for a friend!

Supplies Used:


Proudly designed by Mlekoshi playground