TWO awesome - Scrapbook Circle July 'Be Real'

Tuesday, July 26, 2016

Hello!  Today, I am sharing a simple page I created using the July ‘Today is the Day’ kit.  I wanted to document a couple photos taken with my phone of my two girls…One 12 and one 6, or 42…closer to my age! ðŸ˜‰

I filmed my process from start to finish, which you can find below, or click HERE to go to my YouTube channel.


We were sitting around on the porch watching the late afternoon pass us by.  Lola was so relaxed and settled for once, and the background made such a lovely contrasting sienna color tho the denim and black.


I painted a quick couple strokes of a pale aqua paint onto a light kraft cardstock for my background.  I added a couple pieces of patterned paper behind my photo, tearing a few of the edges.  I tucked lots of Elle’s Studio, Fancy Pants and Pretty Little Studio labels and tags underneath my photo.


Finally, I used a couple wood veneers that are Scrapbook Exclusive pieces in the July kit.  I added some journaling underneath the date stamp and added a few puffy stickers.


Thanks for stopping by today and I hope you have an amazing day!


JUMP - The Crafter's Workshop

Wednesday, July 20, 2016

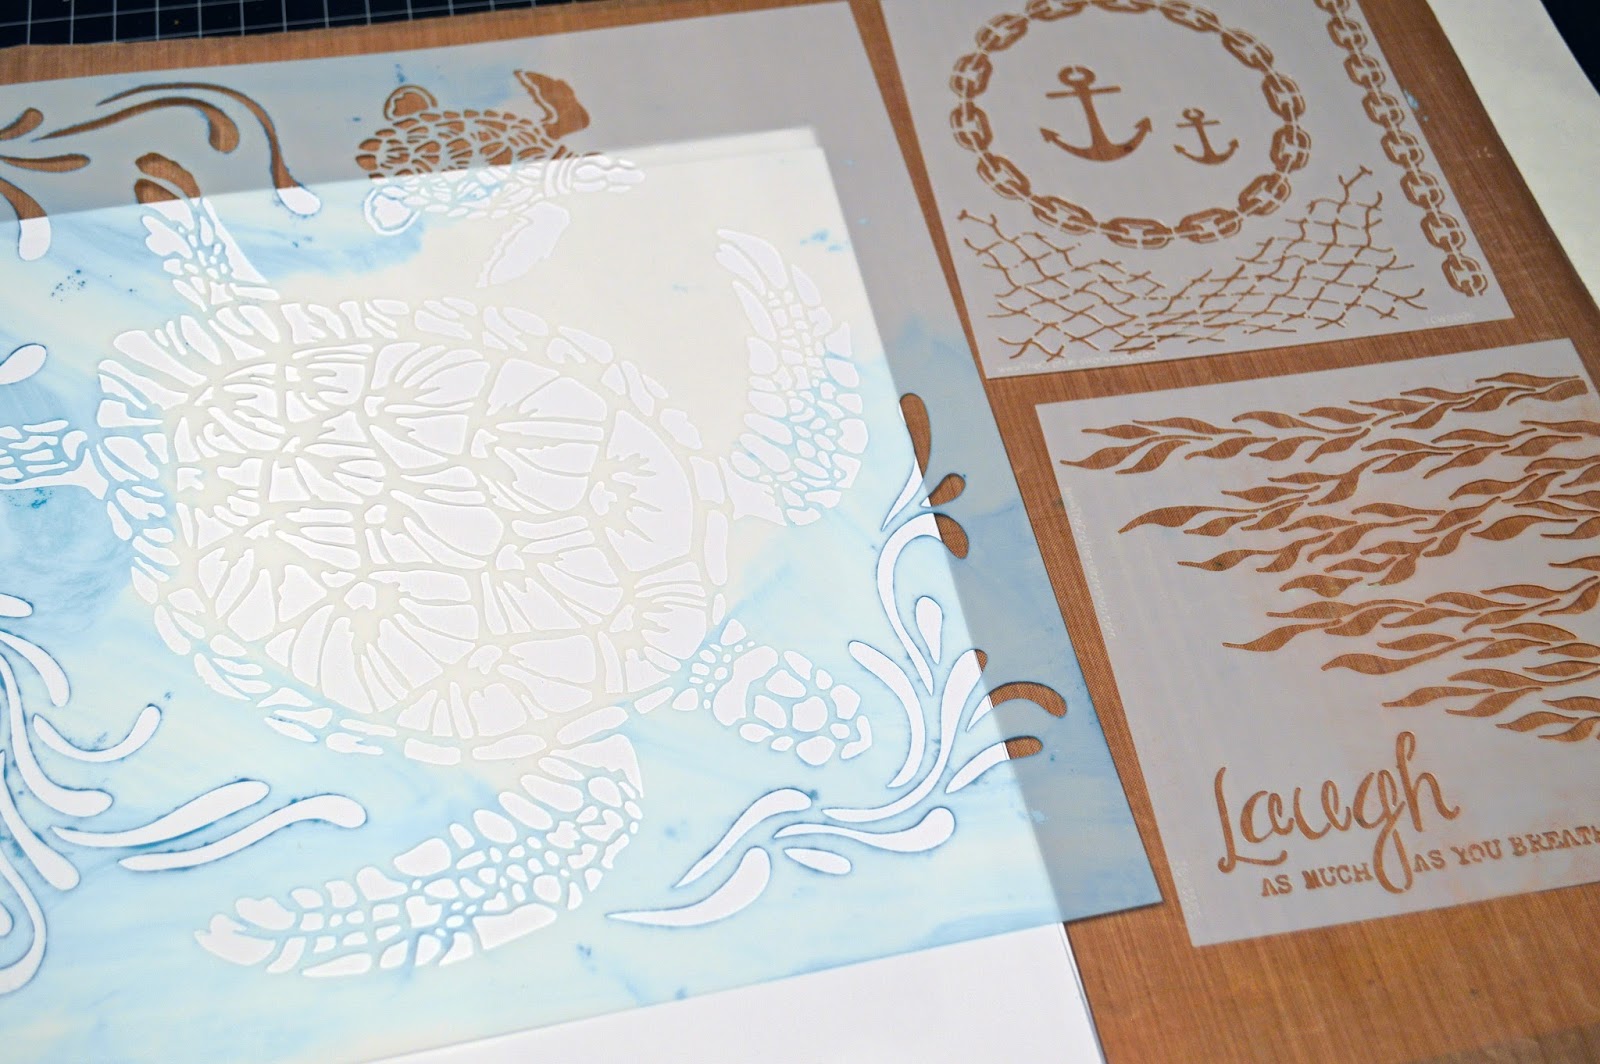
Hi there friends!  I am sharing a scrapbooking layout today perfect for summer fun!  I used 3 different stencils from The Crafter's Workshop to create this watery background for my photo from the lake.
The Crafter’s Workshop provided me with some product to create this project.  The opinions I share are solely my own.

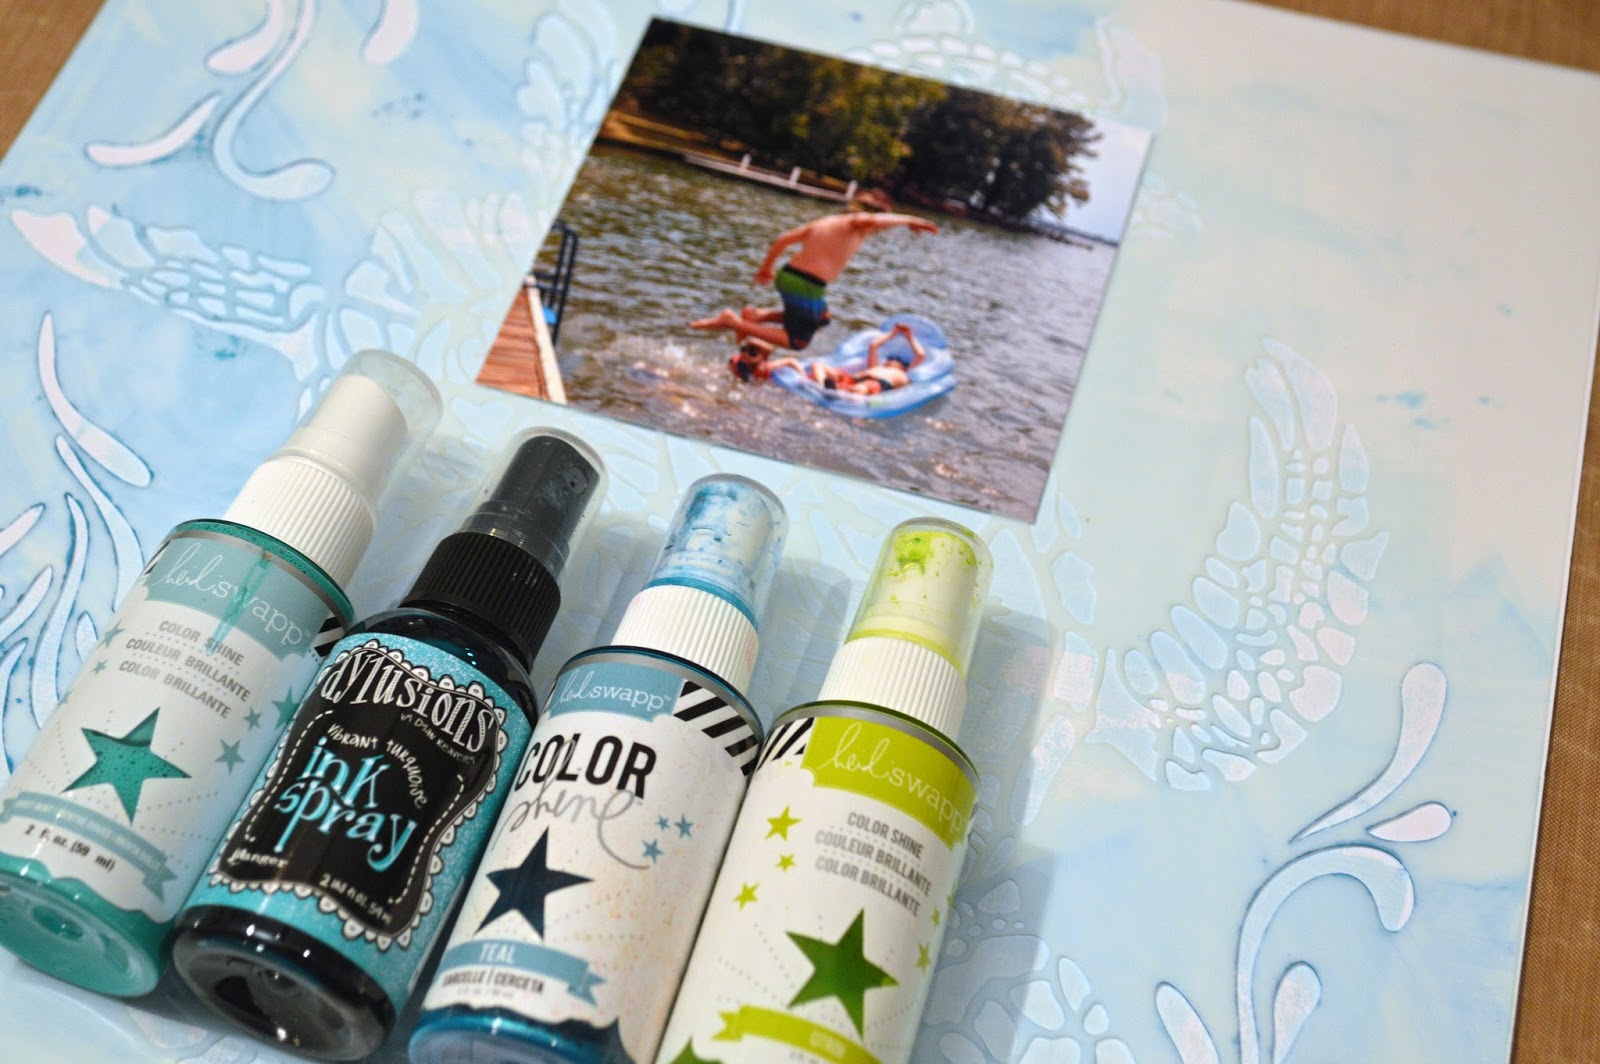
We just spent a lovely weekend at the lake with friends.  I took some fun action shots and slow-mo videos of all the kids jumping into the water.  I knew the photos would be fun to document, a beautiful day & summer memories, and it made me think of these sea/water stencils.
I used the 12×12 Sea Turtles stencil for the main design of the background.
I added this large stencil to cardstock that I had already loosely painted pale aqua acrylic paint using a brayer.
I used several spray inks to stencil this design onto a piece of white cardstock.

After the turtle dried, I used 3 or 4 of the Distress Inks shown in the photo to add ‘seaweed leaves’ in the corners of my background.

Deciding I needed a little bit of black, I used another stencil to add some of the ‘net’ pieces on this 6×6 nautical stencil.
Finally, I used a piece of this woodgrain patterned paper to stencil the smaller anchors in navy ink.
Obviously, I thought the woodgrain worked with the photo of the kids jumping off the dock.  Finally, I added some labels for the date & title, puffy stickers and photo corners.


Here is the finished layout!  The photo fails to grasp the kaleidoscope of blues and greens that were in our surroundings, but my goal was to capture a bit into my stenciled background.
Thanks so much for stopping by the Blog today!
STENCILS Used:

smile - Scrapbook Circle July 2016

Thursday, July 14, 2016

I am really excited to sharing something for this week's post at Scrapbook Circle using the 'Today Is the Day' July kit.  Helping coordinate the Blog, GDT's and our summer schedule has left little time for designing.  I wanted to create a simple graphic page with this patterned paper that would make my photo pop! smile_SBC_July 2016 border
 I made a start to finish video of my process…click below or HERE to see it!
I started by cutting this large stacked butterfly design on the Elle’s Studio paper with my Silhouette.  I thought this paper would be an eye catching way to include the die-cut words, as the center to each butterfly.
smile_SBC_July 2016 (7)
I used an inch of the same patterned paper as a border, on the right side of the background.  I chose a few of the Elle’s Studio wood veneers and painted them matching colors using my gelatos.  I am a little crazy about color matching embellishments lately and these vibrant summer colors in the July kit are perfect for my current obsession!


I added most of the embellishments using a hot glue gun and added a few color coordinated stickers and die-cuts.  The ‘smile’ puffy sticker from Fancy Pants served as my title!  
smile_SBC_July 2016 (8)

Thanks for stopping by the Blog today!
Have an amazing day!!

SEEING RED - The Crafter's Workshop July 2016

Tuesday, July 12, 2016

Hi there friends!  Today, I am sharing summer on a page from an earlier post on The Crafter's Workshop!  Or at least, what lots of our summer Sundays look like.  I used 3 stencils, two 6×6 and a 12×12 version of one of the smaller ones.  I also made a process video you can find below!


The Crafter’s Workshop provided me with some product to create this project.  The opinions I share are solely my own.


You can click on the link below or find the process video HERE:


I wanted to document the Instagram photos my husband took of his tomato salad prep, step-by-step.  I thought this organized grid shaped stencil would be perfect for what I had in mind.


I used my Silhouette to cut a frame out of a 12×12 piece of cardstock with 9 squares cut out of it.  Using a couple scrap pieces of the negative cardstock and green tinted molding paste, I stenciled a few leaves.


I used a variety of Distress Ink, spray mists and molding pastes to create different patterns with that grid stencil, utilizing both the 12×12 and the smaller 6×6 in the same pattern.


I added the molding paste leaves and a couple stamps I punched out to add interest and dimension.  I also added some alpha stickers into the center square for my title.


I thought the repeated shapes in the stencil went well with the elements in the salad and complimented the photos without taking away from the vibrant pictures.


Here is the final layout.  I added stitching in both a straight stitch and zigzag pattern randomly around the page.  I added a couple geometric cork pieces, a date stamp and description to finish it off!


Thanks so much for stopping by the Blog today!  Have an amazingly summery day, or wintery, depending on your locale...!
STENCILS Used:


loLa - Scrapbook Circle DT Choice June

Monday, June 27, 2016

Hi there!  I am happy to share this layout I made using the June‘Now or Never’ kit from Scrapbook Circle.
loLa_SBC_July 2016 border
I had planned to use a different photo, in color, when choosing the products and papers I wanted to us for this page.  But, these black and white photos of our dog, Lola, popped so well with the color palette I changed my mind. Starting with this heart confetti paper from Pinkfresh Studio as my background paper, I layered 2 other papers towards the top of the page.
loLa_SBC_July 2016 (10)
After adding dimensional adhesive on my photos, I tucked lots of stickers and die cuts around the pictures creating layers and interest.  I used a gold foil kraft tag from Jillibean Soup on the right side and tucked it under the photo until it read ‘joy,’ instead of ‘enjoy.’   I placed the heart die cut to point towards the title at the bottom of the page.
loLa_SBC_July 2016 (7)
This was a fun layout to create and just play!  Thanks for stopping by the blog today and have an amazing day!

LIVE A colorful LIFE - The Crafter's Workshop June

Thursday, June 23, 2016

Hi there!  Today I am sharing a simple scrapbook layout using a 12×12 stencil from The Crafter's Workshop and gel medium as a resist for paint.


The Crafter’s Workshop provided me with some product to create this project.  The opinions I share are solely my own.
This large doodling stencil looks like a giant postmark stamp to me and a bit like a ring left from a drink on the table.  I thought it would be great for a vacation photo and decided to use a photo from a beach trip a couple years ago.


I used this matte gel medium and a small palette knife to apply the gel onto a piece of white cardstock.  I didn’t apply it too thick, but did cover all of the stencil.


After the gel dried completely, I used several mists in various colors of blue and teal.  As soon as I misted over the cardstock with paint, I used a baby wipe to wipe the paint off the stenciled area.


The gel looked like thick white paint and all the mist wiped right off.  It acted as a perfect resist medium.  I cut my photo down to a small square to fit inside the frame part of the stencil.


I trimmed down one side and added some patterned paper on one side.  I added a couple die cut tags and circles, puffy stickers and a couple date stamps.


This will definitely become a new favorite technique to use with my stencils!
Thanks for stopping by today!  You can follow the link below to the stencils I used:
STENCIL Used:

CoUgar waLk - Scrapbook Circle June

Monday, June 13, 2016

Hello friends!  I haven't been blogging very consistently since the kids got out of school.  Summer seems to be either slow and everyone's "so bored" or we are flying 90 mph through planned activities!  At any rate, this is the first page I made using the Scrapbook Circle June 'Now or Never' kit.


The photo is from the last day of my daughter's 6th grade year!  The photo is silly and funny, just like these girls and I wanted to make something loose and fun to fit the mood!  This LO took only about 30 minutes, cutting everything with scissors, or tearing the edges of some patterned paper.


I chose a couple tags and stickers that had similar colors and clustered them all together.  I used the alpha stickers on top of the Pretty Little Studio gold labels and stitched through them.  I didn't think about it too much, choosing which ever piece I grabbed first.  Making it look random, since it was! ;)
I added some splatters of black India Ink and that was it!


This is the kind of project that I love to create, simple, quick and enjoyable for me!  Sometimes, we get so caught up in techniques or wanting to make this perfect that it takes the fun out of it.  I need to remind myself of that...often, in life as well!

Thanks for stopping by today and hopefully I will be back to a more regular posting schedule!
Have an amazing day!

Proudly designed by Mlekoshi playground