JOY - A simple Holiday Card (& video)

Tuesday, November 26, 2019

Hi there!  I am sharing a Card I created with the intent to make it within 5-7 minutes!  Ha!
That didn't work.  But, it is still a simple, fairly quick card, that would be easily replicated.
I filmed the process so you can see how I made it and exactly how long it did take.


You can click on the link below or HERE to go directly to YouTube Channel.


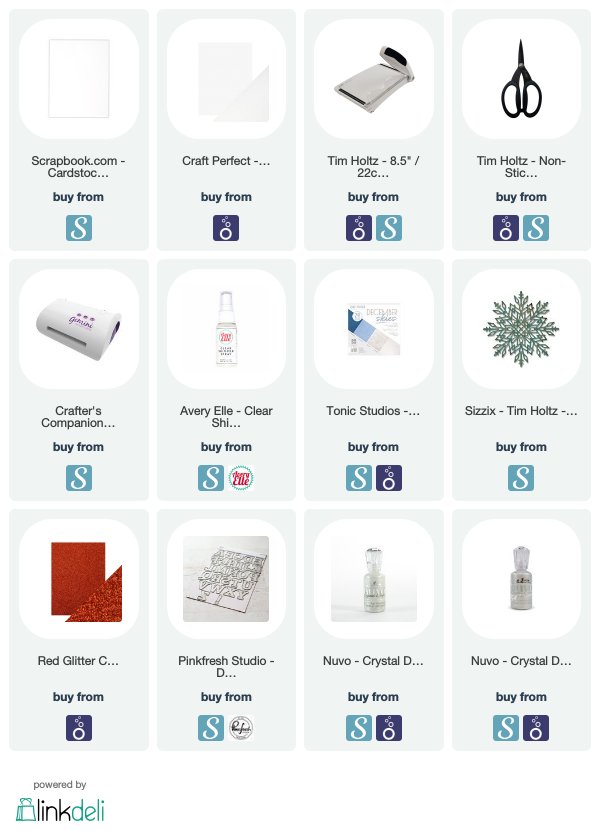
I used an Snowflake embossing folder from Sizzix on a plain piece of white cardstock and after
running it thru my Gemini Jr. I misted it with Clear Shimmer Mist from Avery Elle.
I added foam tape to the back of it and adhered it to another piece of Pearlescent Cardstock
from Tonic Studios that was glued onto the face of my card base.


Using a piece of 6x6 silver cardstock from Tonic Studios, I die cut this large,
intricate snowflake from Tim Holtz for Sizzix.


I die cut the "Adore Alpha" letters from Pinkfresh Studio out of this gorgeous red glitter
cardstock and only used the outside halo card of the letters. Layering all the die cuts,
I adhered them onto the dry embossed piece with liquid glue.


To finish up the card, I added two colors of Nuvo Crystal Drops around the snowflakes.


Thanks for stopping by the Blog today.
I'm going to try again with another timed card, but will definitely give myself more time.
A list of the supplies I used are listed below and there are affiliate links used at no cost to you.
Have a great day or if you're in the U.S., Happy Thanksgiving!
SENDING YOU hugs - Card & Video

Saturday, November 23, 2019

Hello!  It has been a hot minute, or a few months since my last Blog Post!
We moved put our house on the market, sold it, bought a new house and moved all in 4 weeks!  And started renovating the new house right when we moved in and started kids in new schools...whew!

It has been a crazy few months and I am finally getting to a place where I can unpack and start creating cards and scrapbook again.
I have missed it so much!  So, I was feeling the Fall colors and love and created
this card below using this gorgeous red rubber background stamp from Neat & Tangled.


You can click on the video below or HERE to go to my YouTube Channel directly.


I heat embossed that large background in white so I could use it as a resist for blending Distress Oxide inks for my sunset.
I think it would be fun to emboss it in gold as well.


I used some images from Lawn Fawn that I had previously colored and added a die cut sentiment,
a small stamped sentiment and some Nuvo Crystal drops.


A simple card and video to get me back into the swing of things!
I am going to be filming my new space and the organizing I will be doing too.
Thanks for stopping by and I hope you have a great day!


Supplies Used:

Cards from Creativation 2019 - Tonic Studios

Monday, June 10, 2019

Even though it is June, I still wanted to share the cards I created for the Tonic Studios booth at Creativation 2019 this past January.  All of these cards were created using the ‘Adorables’ Stamp & Die Sets and colored with Nuvo alcohol markers, as well as other Tonic products.


This first card I used different sizes of the Tonic Basic circle dies to cut out circles for these colored images from the ‘Ellie Goes Nuts’ set.  I used some of the Hybrid Inks to blend color underneath the circles.  I heat embossed the sentiment that is parts of the stamp set.  I covered the balloon in Nuvo Crystal Drops to give it the shine.


The next card, I used one of the Patterned Panel Dies to cut a panel out of white cardstock.  I adhered it to another piece of A2 sized cardstock and misted them both using Nuvo Mist in Turkish Rose.  I cut out a scalloped circle from the misted piece and added foam tape to the back.


I used Distress Oxide Inks to blend the area behind the scalloped opening and added this skunk and other elements from the ‘Scent Wiff Love’ set.  I love the speech bubble with its hearts and free form shape. 


For the final card, I used the Adorables ‘Kirby & Lulu’s Wash Day’ stamp set to create this window border shaker card.  I used a couple different stitched border frame dies for both the window and outside frame.  I used a combination of acetate & vellum behind the frame as a background for my shaker elements and the sentiment.


I used dimensional foam tape to pop up the center shaker portion and add some patterned paper between the two frames.  I used several types of Nuvo confetti and glitter for the shaker bits.  I adhered all my colored images from the stamp set and from a couple other new Tonic ones to the outside the acetate.  I heat embossed the sentiment in black onto vellum and added Some detail with a white gel pen.


That’s it!  It took a while to post these, but wanted to spread them out between several weeks and other projects!  There are so many recent, fun examples of projects using the Adorables sets, check them out! 
Thanks for stopping by and I hope you have a great week!

Mix Tape Shaker Card + Save the Crafty YouTubeR Video Hop!

Monday, May 27, 2019

Hellooo! and welcome to my video for the 'Save the Crafty You TubeR's Video Hop!
I am super excited to be a part of this event and am just as excited to share the card I created for the Hop.

The next stop on the Video Hop is: https://youtu.be/vnnoluntYjQ To enter for MY prize of a $25 Scrapbook.com Gift Card, you must leave a comment on this video.
Comments must be left by June 5th. Prizes will be announced by June 10th on Justine's Blog:

The Save the Crafty YouTubeR Video hop is a celebration of cardmaking video tutorials created by a group of talented crafters of all different styles and levels. We are coming together to give our viewers a chance to discover other amazing cardmakers and help reach monetization goals! All you have to is watch, like the video, consider subscribing, and click the link in the video description below to hop to the next video. Let yourself be inspired! Don't forget to comment because we have tons of prizes to give away. Please indicate if you are located in the USA of International so that prizes can be awarded appropriately as some prizes (not all!) have restrictions on them.


Using the Concord & 9th 'Mix Tape' Stamp Set I created a shaker card using the set as well as a stencil to add some pattern of musical notes to the background.  You can click on the video above or HERE to go directly to my YouTube Channel!


This stamp set has the coolest coordinating pieces like titles, cassette tape details and a roll of unspooled tape in the shape of a heart and a 'hello' sentiment.  I used the heart and cut out the inside for the shaker portion, coordinating the ink colors I used based on the shaker sequins.


I finished off the card by embellishing it with some Nuvo Crystal Drops in Metallic Silver Lining and some Jewel Drops in Pale Periwinkle.  I hope this card inspired you to create a shaker card out of something totally not intended for a shaker!  Please check out the video, leave a comment to enter for my prize and hop along to enter for all the other prizes available!
Thanks for stopping by and have an amazing week!

Everyday Cards - Tonic Studios Craft Kit #21

Wednesday, May 22, 2019

Today, I am sharing two cards I created using the Tonic Studios Craft Kit #21.


You an click on the video below for the process for making these cards or HERE to go directly to my YouTube Channel.


Tonic Studios provided me with some of the products used but the ideas are solely my own.  Some affiliate links are included in supply list at no cost to you!

This first card was made using the intricate Rose die that is part of the kit and cutting it twice out of the same piece of white Pearlescent cardstock, rotating the die 180 degrees between cuts to create this pattern.


The die cut piece is overlaying a piece of plain cardstock that was sponged with several thin layers of Embellishment Mousse.  Those two pieces were matted onto a piece of Navy Classic Cardstock from the kit and adhered to a white card base.  Using the same navy cardstock, I cut the sentiment out three times using another die from the kit, stacked for added dimension.  I finished of the card by adding Aqua Shimmer to the sentiment as well as 3 different types of Nuvo Drops, including the newly released Stone Drops!


For the second card, I used the stencil that came in the kit and added a continuous pattern of these hearts and dots onto the same Navy cardstock.  I matted it with one of the Specialty paper from the kit in the gorgeous Gold.


 I used that same gold cardstock to cut out the other sentiment from the kit as well as the border in vellum.  After adhering it to the front of my card base, I finished it off with more Stone Drops and Nuvo Drops in gold.


Thanks so much for stopping by today and I hope you get to check out the video.  These were pretty simple and the kind of everyday cards I always need in my stash!
Have a great day!


( Aunt's ) Day Card - Heat Embossed Background & Distress Inks

Sunday, May 12, 2019

Hello!  Happy Mother's Day!  Today, I am sharing a card I created for my sister-in-law for Mother's Day using this awesome stamp set from Simon Says Stamp.  It has so many options for 'mother' including 'Aunt' and 'Mum.'


You can click on the video below or HERE to go directly to my YouTube Channel.


I began with the Floral Background Stamp that I heat embossed in white onto watercolor paper.  I used three Distress Inks to smush some watered down ink to the paper.  After drying the inks, I used one of the large heart dies from Tonic Studios.


I added a foam layer, cut the same way to add dimension to the top background stamp.  I heat embossed the stamp onto a piece of white cardstock using a high detail gold embossing powder.  After adhering all these layers onto the card base, I used the Nuvo glue pen to add lots of similar colors of sequins randomly to the card front.


Thanks for stopping by today and hope you all have a great Sunday and coming week!  The supplies I used are linked below.  

Some affiliate links are used at no cost to you.


Die Cut Shaker Cards - Tonic Craft Kits

Wednesday, May 8, 2019

Hello!  Today I am sharing a Shaker Card I created using one of the Die Cut Patterned Panels and full sized sealed pocket of sequins and confetti behind the die cut piece.  I used at least two products from the Tonic Craft Kits, #18 & #21 in this card.  I love being able to mix and match pieces and products for continued use!


Below is the video I filmed of the process, which can click on to watch, or go HERE directly to my YouTube Channel.


I cut the intricate panel die, 'Vibrant Damask' from some heavy weight cardstock as well as 2 layers of foam for dimension.  Using one of the Project Life pocket cards, I created a pocket the same size as the die cut piece to make the entire card a shaker.  I filled the pocket with various sequins and confetti and sealed the pocket to size with my Fuse tool from We R Memory Keepers.


I used the trio of Hybrid Inks from the 'Dream in Color' Trend collection to blend a circular pattern on the piece of cardstock the shaker pocket.  I used a stamp from the Tonic Craft kit #18 to heat emboss this sentiment in white onto a piece of heavy acetate.  I used two of the Tonic Basics circular dies to cut a round frame out of the gold glitter card from the Craft kit #21.


Finally, I began to combine the elements of the card, starting with the blended ink background on to the card base, followed by the shaker pocket, then the stacked layers of die cut patterned panels and finishing it off with the acetate framed sentiment.  I added a couple of the Rose Triad gems to the acetate too. 


I did add some heat embossed stamping, from that same craft kit, to coordinate an envelope.  I love the way this card turned out and need to do another card which highlights this combination of blended inks, without covering it up!  Thanks for stopping by today and hope you have a great week!


Proudly designed by Mlekoshi playground