what matters - Art Journal - The Crafter's Workshop July 2018

Friday, July 27, 2018


Hello lovely crafters!  I’m super excited to share this new Art Journal spread I created for The Crafter's Workshop a couple weeks ago.


The Crafter’s Workshop provided me with some product to create this project.  The opinions I share are solely my own.


Below are the stencils and lots of various mediums I used.


After prepping my pages with the Clear Gesso, I pulled lots of stencils with repetitive patterns on them and several sheets of Altered Pages vintage printables.  I also used part of a Gold Foil sheet on the Mixed Media Foam from ThermoWeb & Rebekah Meyer that I had left over from Christmas. 


I used gelatos for the base color of my spread.


After I blended the gelatos with water, I used the Gel Medium as a glue to make a collage with the Altered Pages printables.


After the Gesso dried, I used the plain Light & Fluffy Modeling Paste across parts of the pages.


I also stenciled some of the Heavy Body Acrylic paints over the 6x6 Micro Dots stencil. 


Next, I added some Distress Inks over the Paste and the edges of the pages.


I wanted to create a focal point for the girl I planned to paint, so I used this large patterned circle stencil and inked it to the left side of the spread using Distress Oxide Ink.


I cut two angel wing shapes out of this piece of the gold foiled medium base.  Using the wings as a guide, I painted a small shape of a face and torso.


After painting an outline of this girl, I added some of the luscious Champagne Gold Modeling Paste to this 6x6 stencil.


I continued to add detail to my girl and planned for her to hold a butterfly, from another 6x6 stencil, in her hands.  The butterfly didn't come out as clear as I had intended, so I tried to outline it with white gel pen and some other colors.


Below are the close-ups and the final pages of the Art Journal.


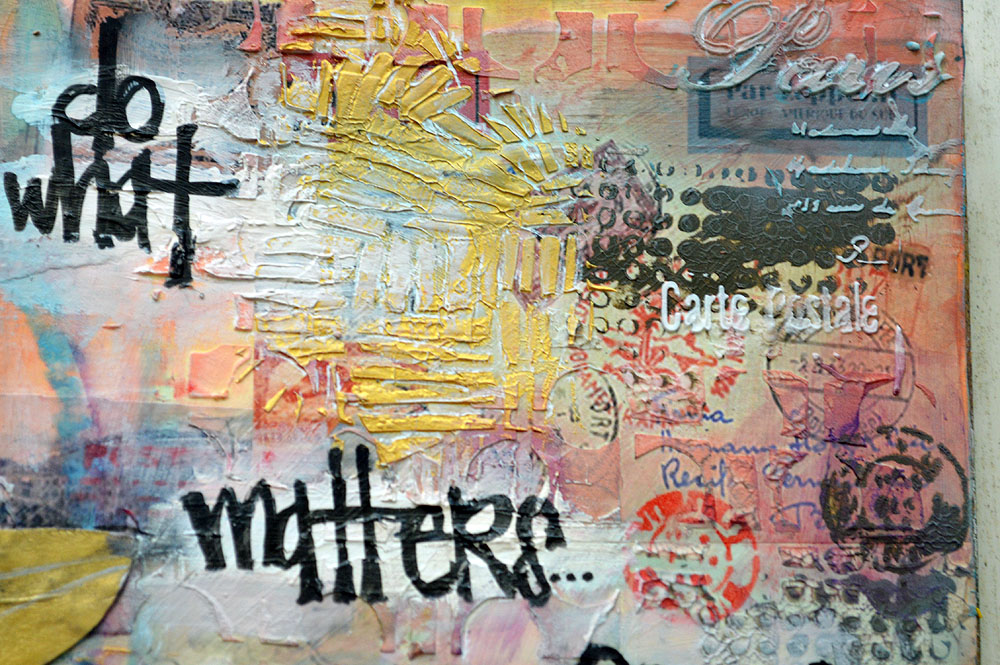
Thanks so much for stopping by today! I hope this inspired you to get creative with your own art journal & do what matters to you!
STENCILS & MEDIUMS Used:
Be sure to share your stencil creations on our Facebook page or by tagging The Crafter’s Workshop on Instagram, Twitter or Pinterest!
The Crafter’s Workshop Design Team Member


At The Shores - The Crafter's Workshop July 2018

Tuesday, July 10, 2018

Hello!  Today I am sharing my recent project from The Crafter's Workshop.  The summer is flying by…which is what inspired me to go ahead and document something from earlier this summer!
Below are the stencils and products I used:

The Crafter’s Workshop provided me with some product to create this project.  The opinions I share are solely my own.
Planning to use watercolor, I started out by spreading a thin layer of Clear Gesso on a piece of white  cardstock.  I have found the easiest way to get a thin layer is to use an old gift card or scrapper of some sort.
While the Gesso dried, I used a small branch stencil as a guide and sketched out the outline onto a piece of hot press watercolor paper.
I fussy cut around all the edges and then added watercolor.
I also added the same range of colors to my cardstock, concentrating the color in the center of the page.
I used the new stencil ‘Under the Sea’ and my stencil brushes to add some light coral and blue shades of Distress Inks to the shells.
I then took some of the Gel Medium and added quite a think later over the large coral piece from that stencil.  My plan was to use it as a resist and add another layer of watercolor over it.
I mixed up a peach color of watercolor and dripped it down the dried Gel Medium.  I added a couple layers after the first dried and it created a nice puddle effect with defined edges.
I felt like it still needed something for a pop, so I used the smaller ‘Under the Sea’ stencil and the Champagne Gold Modeling Paste to layer another coral piece on top of the Gel Medium.
At first, I was disappointed I added such a thick layer and didn’t achieve the definition I wanted.  Looking at it after it dried, it is perfect for a coral piece, with the texture and layering!
After fussy cutting out the shells, I layered them with my photo and some other papers and vellum.
I finished the layout up by adding some journaling, onto a piece of paper I slipped into a polka dot bag, tucked behind the photo.  Then I mounted the whole thing onto a piece of patterned paper.
These are some detail shots of the finished page!
Thanks for stopping by the Blog today!  I love to scrapbook old photos and memories, but sometimes documenting the event while it’s fresh in you mind is a great way to extend that memory for a little while longer!
Supplies Used:
TCW709s – 6×6 Doodling Template – Under the Sea
Proudly designed by Mlekoshi playground