Showing posts with label evalicious. Show all posts

SEEING RED - The Crafter's Workshop July 2016

Tuesday, July 12, 2016

Hi there friends!  Today, I am sharing summer on a page from an earlier post on The Crafter's Workshop!  Or at least, what lots of our summer Sundays look like.  I used 3 stencils, two 6×6 and a 12×12 version of one of the smaller ones.  I also made a process video you can find below!


The Crafter’s Workshop provided me with some product to create this project.  The opinions I share are solely my own.


You can click on the link below or find the process video HERE:


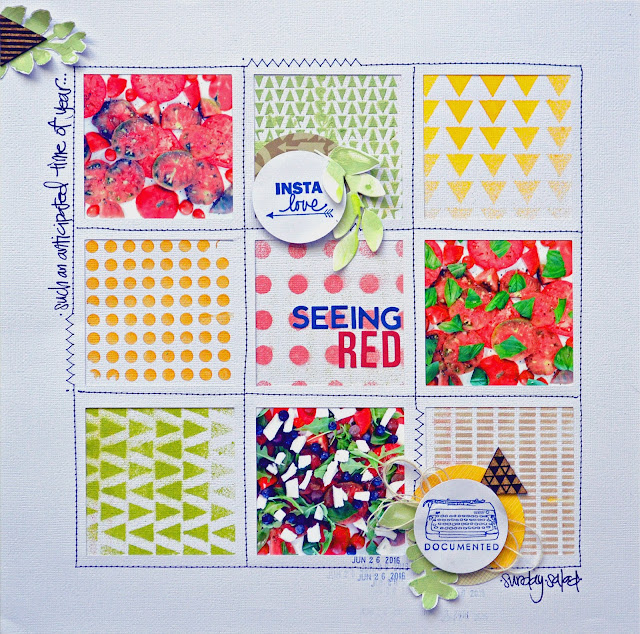
I wanted to document the Instagram photos my husband took of his tomato salad prep, step-by-step.  I thought this organized grid shaped stencil would be perfect for what I had in mind.


I used my Silhouette to cut a frame out of a 12×12 piece of cardstock with 9 squares cut out of it.  Using a couple scrap pieces of the negative cardstock and green tinted molding paste, I stenciled a few leaves.


I used a variety of Distress Ink, spray mists and molding pastes to create different patterns with that grid stencil, utilizing both the 12×12 and the smaller 6×6 in the same pattern.


I added the molding paste leaves and a couple stamps I punched out to add interest and dimension.  I also added some alpha stickers into the center square for my title.


I thought the repeated shapes in the stencil went well with the elements in the salad and complimented the photos without taking away from the vibrant pictures.


Here is the final layout.  I added stitching in both a straight stitch and zigzag pattern randomly around the page.  I added a couple geometric cork pieces, a date stamp and description to finish it off!


Thanks so much for stopping by the Blog today!  Have an amazingly summery day, or wintery, depending on your locale...!
STENCILS Used:


make it HAPPEN - The Crafter's Workshop January

Sunday, January 31, 2016

Hi there everyone!  Last week on The Crafter's Workshop I shared a fun & different way to use your stencils.  It was definitely a labor of love, but therapeutic and I love the end result!

*The Crafter’s Workshop provided me with some product to create this project. The opinions I share are solely my own.*

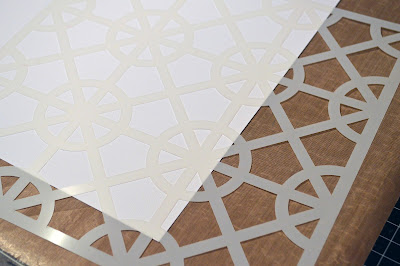
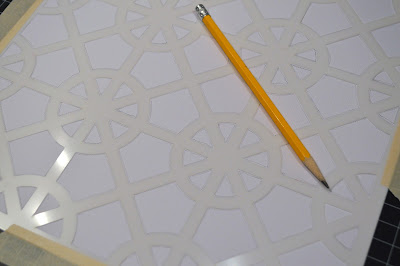
Using the ‘Wagon Wheel’ stencil and white cardstock , I traced the negative spaces, taping my stencil and paper to my board.  I didn’t trace every part of it, leaving some areas that would just be white space.  I think doing this makes it unique and the graphic more dynamic!
Then using my X-acto blade, I cut out the lines I traced.  I used a metal ruler for the straight lines and just cut the curves free hand.
This technique is a great way to use scraps and 6×6 paper pads.  I chose a variety of patterns and colors,  knowing that my photo would pop on a piece of black patterned paper.
I used a couple of the cut out pieces for a loose template and washi tape on the back side to hold the papers in place.  I left a few of the small spaces blank, since I put another black cardstock behind my pieced background.  The additional cardstock secured all the paper pieces and I stitched some of it with my sewing machine.

I added my photo with dimensional adhesive and clustered a few embellishments and tags around my photo.  Actually, all the embellishments I used were out on my desk, but found a home on this layout!


Thanks for stopping by today!  Enjoy your afternoon.  
You can follow the link below to the stencils I used:
STENCIL Used:

smile - WORTH MENTIONING | Scrapbook Circle December Sketch

Friday, December 18, 2015

Happy Friday everyone!!  Just wanted to post my layout for the December Scrapbook Circle Sketch Challenge.  I used the December "Tell Your Story" main kit, mostly inspired by the Amy Tangerine patterned paper 'Token.'


I loved this paper and wanted to contrast it heavily using a black & white photo.  It also had me itching to paint the background, which I did with watercolor, matching the brush patterns a bit.

  
I used the Scrapbook Circle acrylic word 'smile' for my title.  I mounted the painted cardstock onto another piece black cardstock.


I added a few stickers, journaling cards and stitching for more detail.


Thanks for stopping by today!  Have an amazing weekend!

Black & White Photos - Scrapbook Circle October Technique Challenge

Monday, October 19, 2015

Scrapbook Circle has a new challenge this month to use a black and white photo in your layout.
Or, like I did, print a color photo in black and white!  I love using this technique, especially to highlight paper or embellishments with lots of color, like those in the 'Mix Tape' October kit.


This gorgeous patterned paper from Bella Blvd. was almost too pretty to cut up, but I wanted to use a good bit of white space to help break up the color.  I didn't use a paper trimmer, just scissors to quickly trim the paper.  The black and white stripe is on the opposite side of this rainbow chevron.


I used a cloud punch on some of the Dear Lizzy 6x6 papers and to the Scrapbook Circle printable to add some coordinating colors around the page.  I added a couple other embellishments and word phrase strips to make little clusters of colors.


The little puffy stickers from Evalicious that are part of the main kit are so cute too!


The date tag was also from the Scrapbook Circle printable.  I trimmed a piece of this paper from Pink Paislee at the bottom for a place to add some journaling and the acrylic word 'thankful' that is another Scrapbook Circle exclusive for my title.  


I love using this technique because it features the best of both worlds...lots of color that doesn't take away from the photo, but helps add contrast to a black and white picture!

This Technique Challenge, with an awesome prize from BasicGrey is going on until November 4th!  You can read the original post HERE and upload your layout to that post or to the Scrapbook Circle Facebook page!

Thanks for stopping by today!

memories - Scrapbook Circle Designer's Choice

Thursday, October 15, 2015

Hi there everyone!  Can you believe October is half way over??  This Fall is flying by and I am still scrapping summer photos!  At Scrapbook Circle yesterday, my Designer's Choice LO featured the awesome digital cut file from the ‘Mix Tape’ kit as a starting point.
memories_SBC_Oct 2015 border
I enlarged the file to 12×12 and cut it out of white cardstock, then trimmed it down so have a tiny border of kraft cardstock along the side.  This also helped me line up the patterned paper to back of the negative space from the cut phrases.  I used this file from the beginning, but ended up using one of the positive cuts, the ‘enjoy,’ for a title on another project.
memories_SBC_Oct 2015 (9)
Saving the cut outs gives me a great second use out of that paper too!  Plus the size of the phrases are a the perfect size for using the Dear Lizzy 6×6 pad that is part of ‘Playlist’ Add-on.  I used a couple other of the cut files and water colored them to match the patterned paper underneath.  I machine stitched through the phrases and around the outside border.
memories_SBC_Oct 2015 (8)
Adding a few of the gorgeous Pink Paislee washi strips around the edges of the photo and combining them with some of the other sticker embellishments finished up the page.
memories_SBC_Oct 2015 (10)
This is a great way to use 6×6 papers and to use lots of patterns and colors but in a way that isn’t so overly stimulating that it takes away from the photo and story.  Thanks for stopping by the blog today and have an amazing day!


enjoy - Scrapbook Circle October Sketch Challenge

Saturday, October 10, 2015

Just a super quick post for this month's Scrapbook Circle Sketch using the October 'Mix Tape' kit.
Check out the original post HERE and add yours by October 21st for a chance to win this prize!


I painted some of the Elle's Studio cork embellishments!


I used one of the exclusive digi-cut files for my title and misted it.


And voila!  Love Diana's sketches, always jumps starts my mojo!

Thanks for stopping by!  Have a great weekend!


Proudly designed by Mlekoshi playground