thank you very mush - Brutus Monroe - Mushroom Garden

Thursday, February 16, 2023


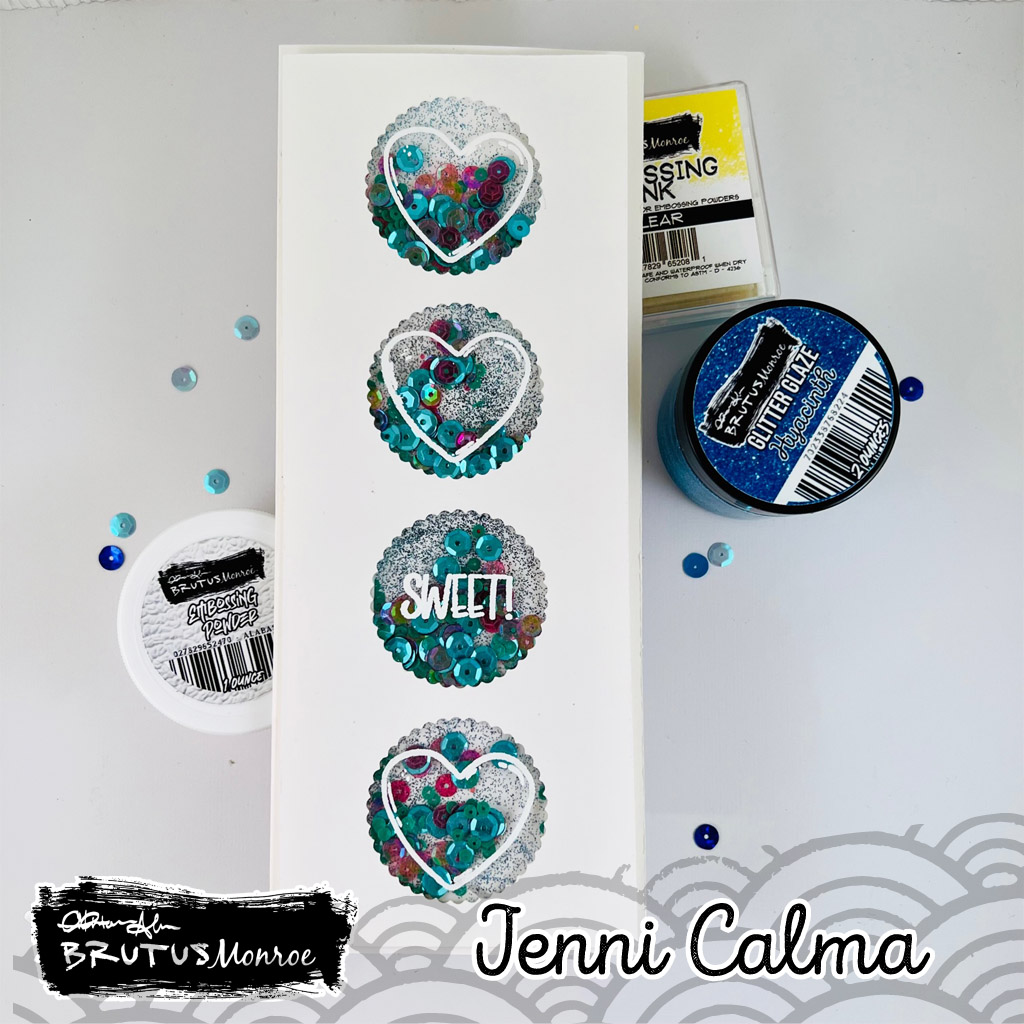
Hello Friends!  This is Jenni here with my first Blog Post. I am excited to share this fun card I made using the February Stamp Set 'Mushroom Garden.' There are 18 images in this 4x6 set and I'm pretty sure I used every one!  I stamped out the images from the set using the Detail Ink in 'Raven' on watercolor cardstock. The Detail Ink is perfect for watercolor, or in my card, Aqua Pigments.
I have so many colors, but the great thing about the aqua pigments is that they blend so easily because they are liquid. I chose to paint the mushrooms on the more realistic side and keep them within the same range of tone to create drama with the black background. After painting and cutting out the images, I grabbed a piece of black cardstock and misted it with the Shimmer Mist in 'Pearl.'
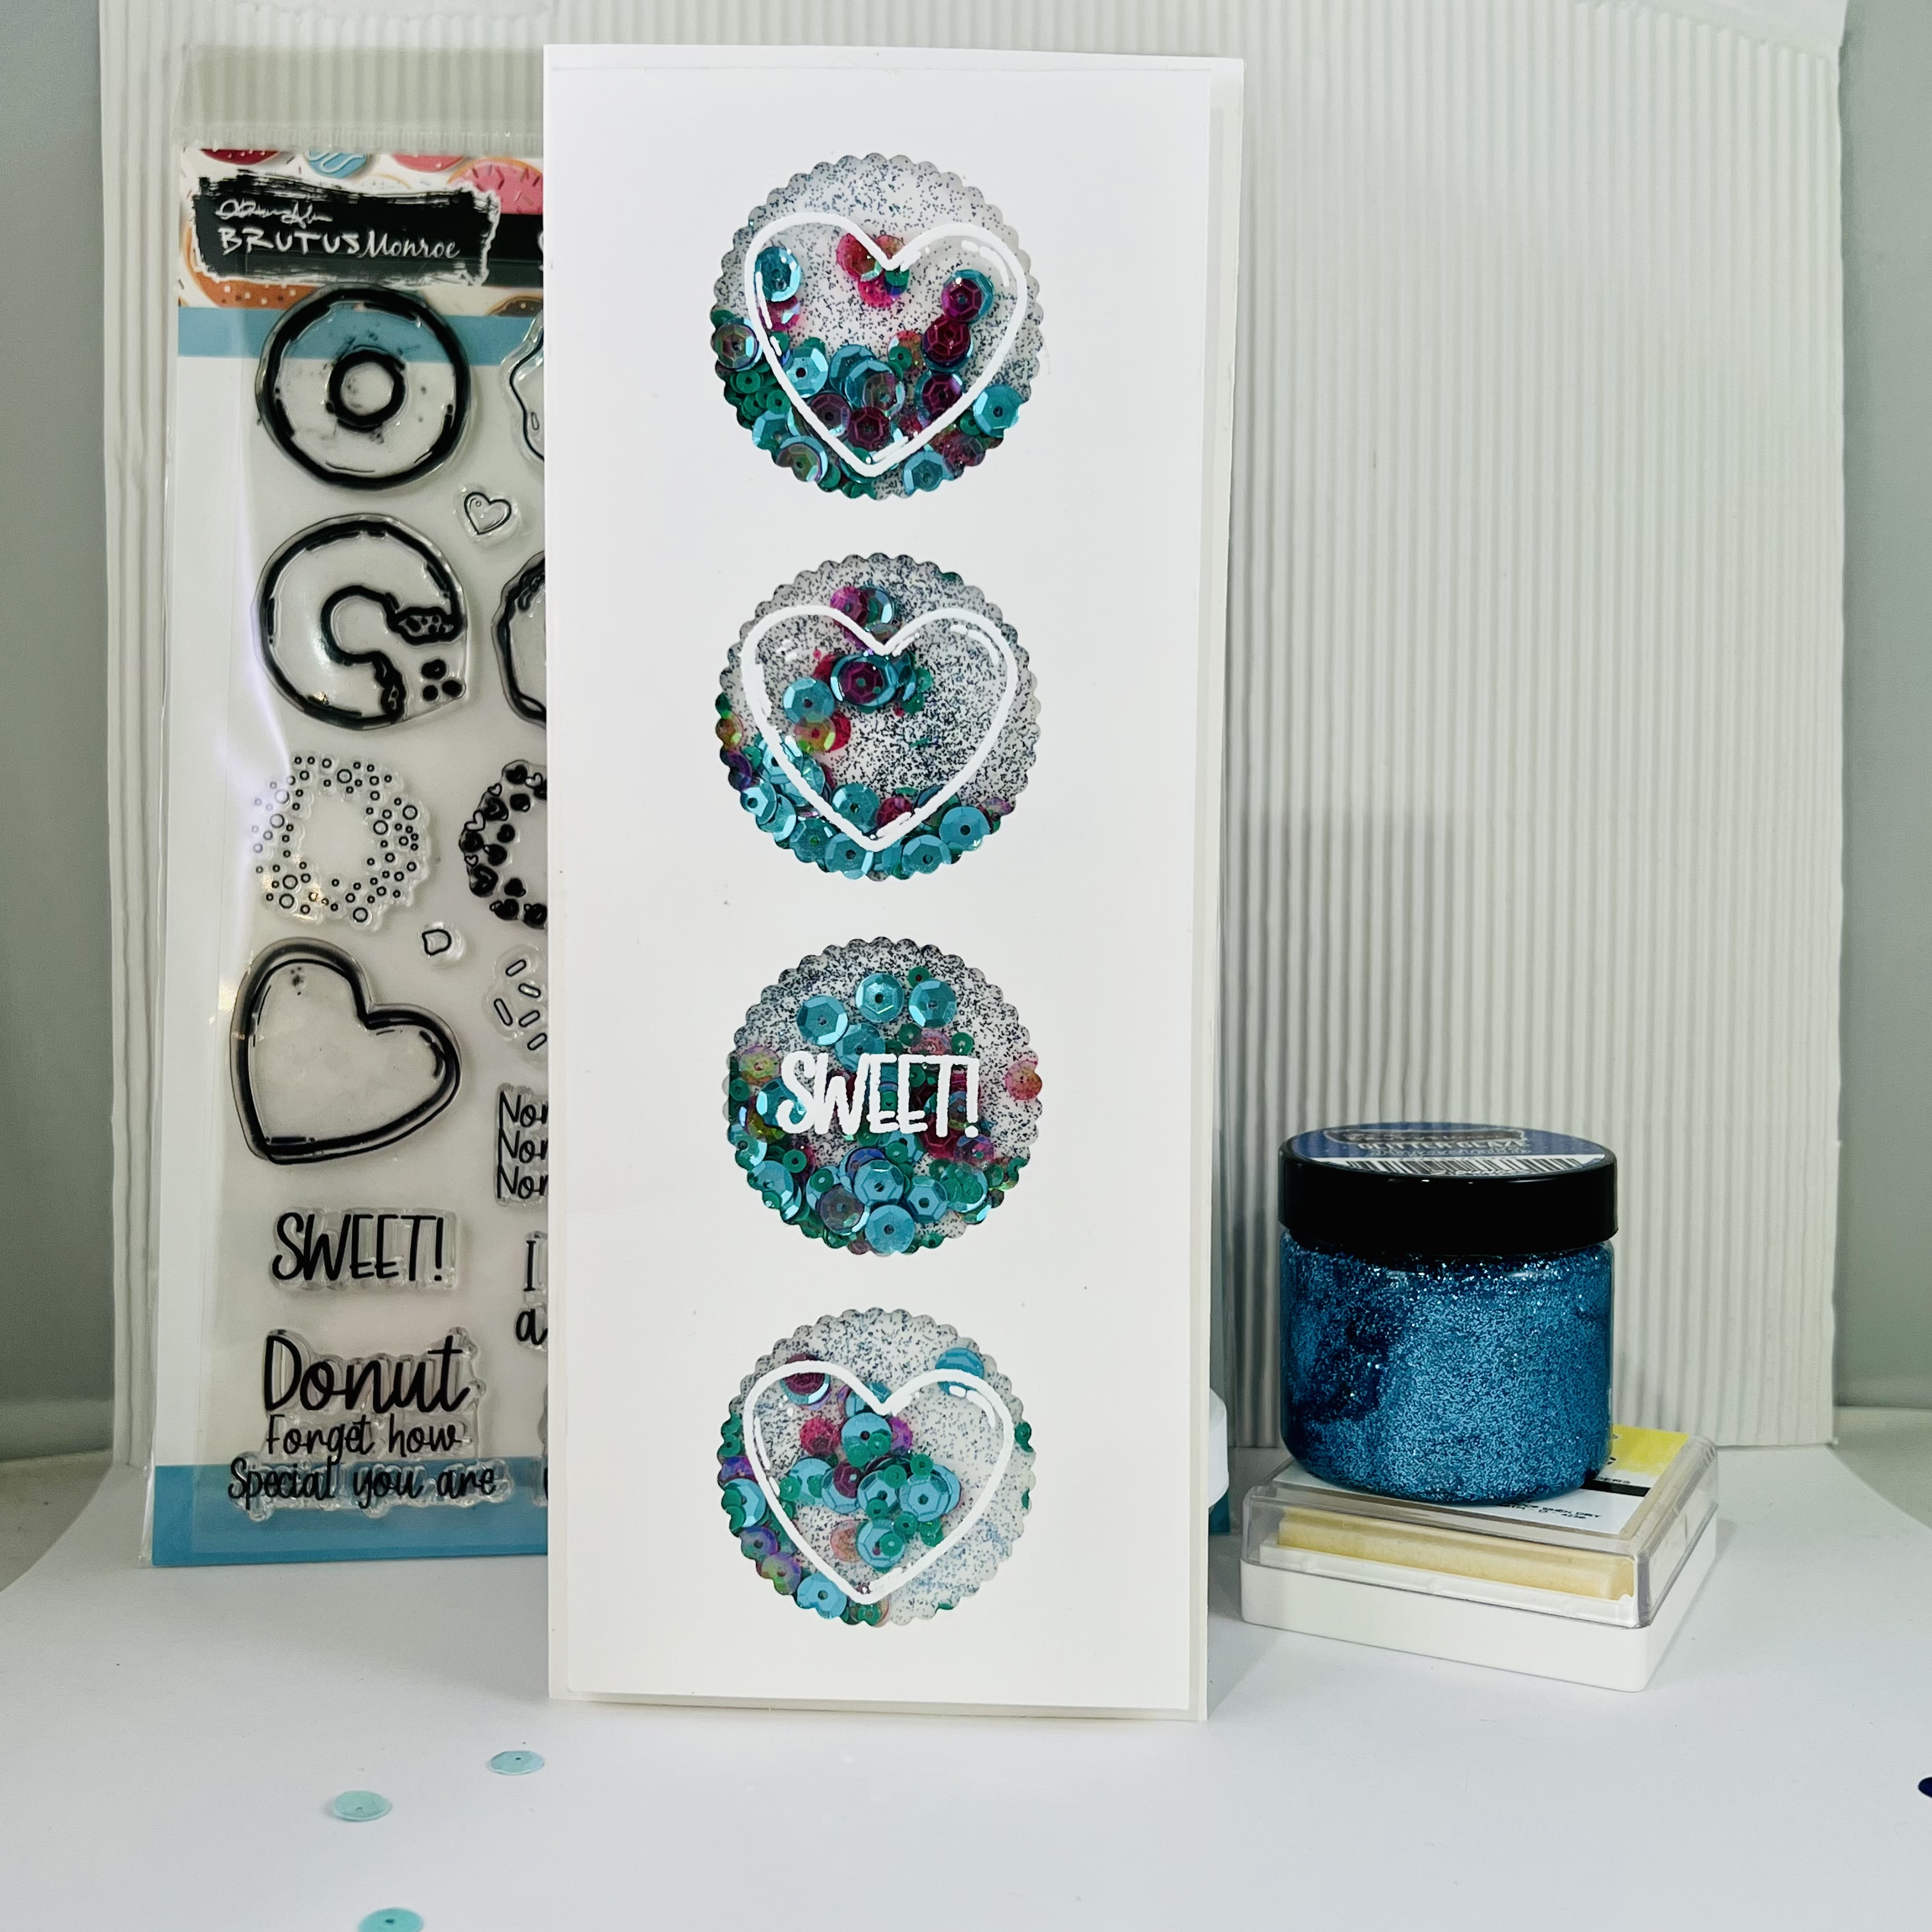
I used the easy squeeze glue to layer the mushrooms around the oval opening I cut into an A2 card base. Underneath the oval opening, I added dimensional foam adhesive and the black misted cardstock piece. I heat embossed the sentiment from the stamp set, thank you very mush, in Alabaster Embossing Powder. Who doesn't love a punny sentiment!? And finally, I used a white gel pen to add some stars all around the mushrooms and sentiment.
Thanks for stopping by the Blog today! Check out the stamp set and all the amazing projects the Inspiration Team created with it too!
Have a great day!

A Hello Card - Brutus Monroe February

Monday, February 13, 2023

Hello everyone!  Thanks for stopping by today and wishing you a great start to another week!

This is a card project from the February inspiration kit. This kit has an adorable stamp and die set called Mushroom Garden,"


I knew I wanted to use the chroma glazes in metallic colors. I used some washi tape to mask off a jagged line down the card front t make it look like a hill. I wanted it to look like slices of sediment layers that the mushrooms were growing out of.

-.

I also thought that leaving the stamped images in black it made them stand out even more for their shapes and spots.


I used a piece of the 6x6 paper pad called tea party as a background for my card. 1 also heat embossed a sentiment from the set and added it to one of the clever sentiment strips that are perfect for everything.
One of my favorite things to do these days is to use black ink, like the brutes Monroe Raven ink, that will stay sticky and then use embossing powder in "Icicle."

Thanks again for checking out the card. Please feel free to comment and communicate with me!

( Most items used are listed and linked below.
They are part of an affiliate and no one but myself benefits from that. )

.

'Hello' card - Creating Your Own Pattern

Tuesday, January 31, 2023

Hello friends!  Thanks for stopping by the Blog today.
I am sharing another project I created for Brutus Monroe using
the Sprinkled with Love 6x6 Paper Pad. 


I have a sketchbook I carry around with me everywhere.
Lately, I have been trying out some drawing apps on my iPad Pro
and have gotten to like them a lot.  I miss paper too much to
use all digital, but this is a little peek at my digital "journal"
I have been using.


The card came out looking a lot like the sketch and that forethought
always makes the design execution more fun and easier for me!


I used a small diamond die to die cut out different patterns from the
paper pad as well as a couple pieces of paper I painted with
yellow Aqua Pigment and Velveteen Glaze in Teal Taffy.

I added foam adhesive dots under the teal pieces for some dimension
and interest and cut out the sentiment from the January Die of the Month!


Thanks again for stopping by and have a wonderful day!

Below is a list of supplies I used and a link to where you can find most of them.
(Some affiliate links used that are at no cost to you)

Sprinkled With Love 6x6 Paper Pad
[ BMR | SBC ]
Die of the Month Club | Breakfast...
[ BMR | SBC ]
Stamp Club Membership | Sprinkles
[ BMR ]
Not Your Mamas Cardstock - Heavyweight
[ BMR ]
Detail Ink - Raven - 2x2
[ BMR | SBC ]
Velveteen Glaze - Teal Taffy
[ BMR ]
Aqua Pigment - Yellow
[ BMR ]
Aqua Pigment - Pink
[ BMR ]
Aqua Pigment - Blue
[ BMR ]
Brutus Monroe | Embossing Ink 2x2
[ BMR ]
Metallic Embossing Powder - Gilded
[ BMR | SBC ]
Candy Coat | Teal
[ BMR | SBC ]
Easy Squeeze Crystal Clear Glue
[ BMR ]
Tonic Studios - Tim Holtz - 6.25 Mini...
[ BMR ]
Crafter's Companion - Gemini Jr. -...
[ SBC ]

I can be anything! - Chameleon Card + Process VIDEO

Tuesday, January 24, 2023

Hello friends!
I am excited to share this fast, fun card with you today as well as the process video I created.  It is the first video I have edited in a WHILE, so be patient with me!

I adore his stamp set and could not wait to wait to use it.  While I do use mostly Brutus Monroe products, it's not a card for the Inspiration Team exclusively


I created two versions of the same card; one colored "inside the lines," and the other more simple dollops of color blended together.

Click HERE or below to watch my process video!


This is a simple 3x4 stamp and a single sentiment that is part of the set.  There is also the coordinating die, although I didn't use it, choosing to stamp directly onto Tim Holtz Watercolor Cardstock instead.

I stamped the image twice using Brutus Monroe detail ink in Raven and then painted two different styles on each card. I added a sentiment I heat embossed and then mounted the painted cards to a card base.

I added an extra layer of textured turquoise paper on the card base to add a color frame and pop from the white.  Simple, quick, and love that message!


And that's it! So many possibilities!
Thanks for stopping by the Blog today.

Below is a list of supplies I used and a link to where you can find most of them.
(Some affiliate links used that are at no cost to you)

SWEET! Brutus Monroe DT - Slimline Shaker Card

Friday, January 20, 2023

Happy Friday friends!
The sun is shining, the sky is blue and it makes me long for Spring!
But, before that can happen, we need to celebrate Valentine's Day AND another shaker card!


This is a slimline card for the Brutus Monroe Inspiration Team
Using the 'Sprinkled With Love' Stamp set.  The stamp set mostly features donuts and sweet treats,
but I wanted to use the hearts to make something a little unexpected.


Using the Chroma Glitter Glaze in Navy, I coated the cardstock behind my shaker openings.
While it was drying, I die cut 4 scalloped circles in the card front and added some foam tape to create space for the shaker areas.


The most difficult part was heat embossing these hearts using Alabaster Embossing Powder onto acetate. I used heat-resistant acetate, but it can still warp if you heat it too directly. Despite using a powder tool, My craft room is full of static and a tornado of dust, glitter, and everything that will stick to acetate. It took a couple tries, but I think the results are totally worth the effort!


Then the fun part, of adding the sequins and putting it all together!

Thanks for stopping by today and hope you have a sweet, sunny weekend!!

Below is a list of supplies I used and a link to where you can find most of them.
(Some affiliate links used that are at no cost to you)

filled with love - Shaker Card Brutus Monroe

Wednesday, January 18, 2023

Hello everyone! I am a sharing card that I made for 
the Brutus Monroe Design Team a couple weeks ago.


This card was made using the January Die Of The Month, 'Breakfast Buddies'
and a few other stamps and paper pads, part of the January Set.


I love shaker cards.  I love making them, I love giving them, 
and I love receiving them! So when I saw this sentiment that said 'filled with love,'
I immediately thought about being filled with love AND sequins!


I started by die-cutting the pieces of the coffee cup I would need, going for some kraft cardstock and colors that are a little more realistic.  I used a stamp from the January Sprinkled with Love stamps set that is actually supposed to be sprinkled for a donut.  I used them for adding polka dots to the coffee cup with the Alabaster Pigment Ink, which is amazing!


I used the Brutus Monroe foam adhesive to cut out the coffee cup as well.


After die-cutting the coordinating sentiment I added a gold dipped look with heat embossing and the Gilded Embossing Powder.  I also chose a piece of the 6x6 patterned paper set for the card base background.


I die-cut a piece of white cardstock for the frame and several layers of foam adhesive strips to create the pocket for the sequins and confetti.  I wanted the coffee cup to be on the outside so the shaker pocket was almost the size of the card base.


I misted a piece of paper for the back of the shaker pocket with the Chroma Mist in Green Glow and sealed it all up!


I put the coffee cup pieces together and then mounted everything onto the shaker pocket and then onto the patterned paper and card base.


I love the way it turned out and I know this will be used
multiple times as a future gift card holder!


Thanks for stopping by the Blog today...
I'm going to be posting on a more consistent period including
some process videos too! Have a great day!

Below is a list of supplies I used and a link to where you can find most of them.
(Some affiliate links used that are at no cost to you)

Proudly designed by Mlekoshi playground