Showing posts with label Webster's Pages. Show all posts

loLa - Scrapbook Circle DT Choice June

Monday, June 27, 2016

Hi there!  I am happy to share this layout I made using the June‘Now or Never’ kit from Scrapbook Circle.
loLa_SBC_July 2016 border
I had planned to use a different photo, in color, when choosing the products and papers I wanted to us for this page.  But, these black and white photos of our dog, Lola, popped so well with the color palette I changed my mind. Starting with this heart confetti paper from Pinkfresh Studio as my background paper, I layered 2 other papers towards the top of the page.
loLa_SBC_July 2016 (10)
After adding dimensional adhesive on my photos, I tucked lots of stickers and die cuts around the pictures creating layers and interest.  I used a gold foil kraft tag from Jillibean Soup on the right side and tucked it under the photo until it read ‘joy,’ instead of ‘enjoy.’   I placed the heart die cut to point towards the title at the bottom of the page.
loLa_SBC_July 2016 (7)
This was a fun layout to create and just play!  Thanks for stopping by the blog today and have an amazing day!

LIVE A colorful LIFE - The Crafter's Workshop June

Thursday, June 23, 2016

Hi there!  Today I am sharing a simple scrapbook layout using a 12×12 stencil from The Crafter's Workshop and gel medium as a resist for paint.


The Crafter’s Workshop provided me with some product to create this project.  The opinions I share are solely my own.
This large doodling stencil looks like a giant postmark stamp to me and a bit like a ring left from a drink on the table.  I thought it would be great for a vacation photo and decided to use a photo from a beach trip a couple years ago.


I used this matte gel medium and a small palette knife to apply the gel onto a piece of white cardstock.  I didn’t apply it too thick, but did cover all of the stencil.


After the gel dried completely, I used several mists in various colors of blue and teal.  As soon as I misted over the cardstock with paint, I used a baby wipe to wipe the paint off the stenciled area.


The gel looked like thick white paint and all the mist wiped right off.  It acted as a perfect resist medium.  I cut my photo down to a small square to fit inside the frame part of the stencil.


I trimmed down one side and added some patterned paper on one side.  I added a couple die cut tags and circles, puffy stickers and a couple date stamps.


This will definitely become a new favorite technique to use with my stencils!
Thanks for stopping by today!  You can follow the link below to the stencils I used:
STENCIL Used:

CoUgar waLk - Scrapbook Circle June

Monday, June 13, 2016

Hello friends!  I haven't been blogging very consistently since the kids got out of school.  Summer seems to be either slow and everyone's "so bored" or we are flying 90 mph through planned activities!  At any rate, this is the first page I made using the Scrapbook Circle June 'Now or Never' kit.


The photo is from the last day of my daughter's 6th grade year!  The photo is silly and funny, just like these girls and I wanted to make something loose and fun to fit the mood!  This LO took only about 30 minutes, cutting everything with scissors, or tearing the edges of some patterned paper.


I chose a couple tags and stickers that had similar colors and clustered them all together.  I used the alpha stickers on top of the Pretty Little Studio gold labels and stitched through them.  I didn't think about it too much, choosing which ever piece I grabbed first.  Making it look random, since it was! ;)
I added some splatters of black India Ink and that was it!


This is the kind of project that I love to create, simple, quick and enjoyable for me!  Sometimes, we get so caught up in techniques or wanting to make this perfect that it takes the fun out of it.  I need to remind myself of that...often, in life as well!

Thanks for stopping by today and hopefully I will be back to a more regular posting schedule!
Have an amazing day!

inspire - Scrapbook Circle April

Friday, April 29, 2016

Happy FriYay!  I wanted to share a layout I created for Scrapbook Circle
with the April 'One Fine Day' kit, just for fun.  There wasn't an assignment or any reason for this page,
and sometimes that makes it easier and lets the creative juices flow!


These were photos from my daughter's 12th birthday.  It turned out to be a hectic day, but we still had a couple friends and a cake...and of course some gifts, including a new planner!

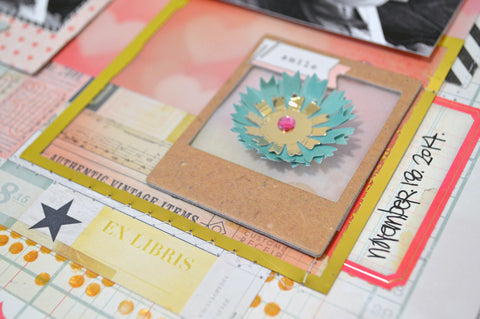
I used the Webster's Pages patterned paper that is a collaged map print in pastels.  I played off the angles in the map, cutting the paper at a 45 degree angle, anchoring the right side.


I cut several of the tiny photo frames from the 6x6 Dear Lizzy pad and then cut them out like frames.  Scattering out the frames, washi strips and a few other embellishments under my photos, popping the pictures up with dimensional adhesive.  I added a few random sequin puff stickers from Pinkfresh Studio and stitched around the outside of the entire background.


I love the soft Spring colors from the April kit, but am looking forward to some bolder colors with May!!  Thanks for stopping by and have an amazing day!


UNIVERSAL SELFIE - Scrapbook Circle April 2015

Friday, May 1, 2015

Happy May!
The other day I shared one of “my choice” pages using the April ‘Let’s Do This’ kit
and a few pieces of the ‘Love It’ Add-on on the Scrapbook Circle Blog.
ALL ABOARD!_SBC_April 2015 border
Sifting through the embellishments this month, I immediately pulled this Amy Tangerine die cut to scrap one of a million photos from our recent trip to Universal Studios.  This was a family selfie taken on the Dr. Seuss train.  It was such a bright and cheerful atmosphere, it needed a fun and free background.  I started with some puddles and watercolor splatters and splotches.
ALL ABOARD!_SBC_April 2015 (5)
I used lots of mint accents with paper, stickers and die cuts to provide a bright contrast to the yellow and orange.  I tucked some hidden journaling into the gold polka dot baggie and layered die cuts in and around it.  I used these tiny acetate triangles, alternating with rub-ons from My Mind’s Eye to loop from the title to the paper airplane die cut.
ALL ABOARD!_SBC_April 2015 (8)
This was a quick, loose layout that was fun to create and captures the laid back feel of that day.  Thanks for stopping by today and hope you have an amazing day & weekend!

# AWESOMENESS - Scrapbook Circle April Sketch

Friday, April 10, 2015


Happy Friday!  Yay!
The new April Sketch Challenge debuted on Scrapbook Circle today!
This is my LO using it and the "Let's Do This" kit and "Love It" add-on.


I stuck to sketch pretty close, but scaled it a bit larger since I wanted to use that gold heart on the
paper from Simple Stories...I started with it and then made everything else proportional.


Instead of splatters I used some of the gold sequins from the kit paired with some from my stash.


The colors the kids are wearing worked so perfectly with the April kit.  I used lots of stitching to tie them all together.  You have until April 22nd to enter for the prize!  Can't wait to see all the creations.


Thanks for stopping by and have an amazing evening!

GARDENING ANGELS - Come On Get Crafty March Sketch

Tuesday, March 24, 2015

Hi there!  The sun is finally shining here in Alabama after what seems like a month long rain cloud hanging over us!
I know it won't last, but it is so beautiful outside, I thought this would be the 
perfect day to share this layout I did for the Come On Ge Crafty Blog March sketch!


The sketch is below and you can find the original blog post with the other DT members pages HERE!


This was such an awesome sketch that translated into 8.5x11, 12x12 & even card layouts.
I used a close up of our cherry tree blooms and paired it with lots of the new Elle's Studio 'Cienna' products.


I love the Elle's Studio wood veneers and all the soft colors are perfect for this photo.
There will be many more projects this Spring with photos of this tree.  We planted it about 7 years ago
in honor of my Dad, who died almost 11 years ago.  That is the reason for the title of the LO.


I used a piece of this gorgeous pink bokeh paper from Webster's Pages as the top border, similar the the sketch.  Instead of squares from the sketch, I used the Elle's Studio die cuts in flowers, tags and the veneers.


I love the gold rub-ons from Pinkfresh Studio and included this phrase at the bottom,
"grow your dreams like flowers..."  A perfect fit!

Thanks for stopping by today and hope the sun is shining today in your part of the world, for at least a little while!

Come On Get Crafty - A Few of My Favorite Things

Saturday, December 13, 2014

I took a break from holiday scrapping and December Daily projects to scrap something different for my post at Come On Get Crafty.  Also, I wanted to talk a little about my love of over embellishing, especially with collections that make that easy!  I grabbed pieces from 3 different Crate Paper collections; Close Knit, Flea Market and Note & Things and layered away!!


I love using a great photo as a basis for the beginning of an exercise in color, graphic design and pattern.  After the photo, I used a couple pieces of 6x6 paperchipboard framewood veneers and loved things around until I was happy!


I stitched through the wood veneers on my page and added some journaling.


Thanks for stopping by the Blog today!  Have an amazing weekend!

Come On Get Crafty - natural beauty & A Few Favs

Saturday, November 29, 2014

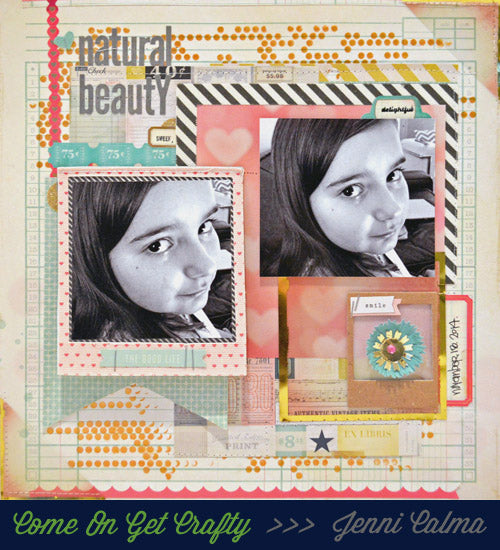
This is one of those projects that working from the same collection makes the creative juices flow so easy!  I love digging through my stash and finding products to go with things I wouldn't normally think of...as well as working with an entire collection that was designed to work together.  This is one of those occasions that working with a collection, or to be more specific, with Crate Paper collections by Maggie Holmes, made everything come together super fast!

I did use some gold modeling paste and a random polka dot mask on the background patterned paper and the rest of it is almost all Maggie Holmes.  The letter stickers are from the Webster's Pages collection from Allison Kreft and I think the subtle grey works well with the black and white photos. 


Working with a collection that is made to work together, it makes layering and clustering so much easier for me.  And I love to stack up lots of layers!  I used one of the stacked paper flowers to tie in the gold and turquoise and layered it onto some vellum under the chipboard frame.  I thought it helped weight the bottom corner to balance out the title in the left corner.

One of the things I decided to do was to use the fabric frame on top of the close up photo.  Since the frame was larger than the photo and I needed to add a piece of patterned paper as a photo mat, I decided that was the perfect chance to add some hidden journaling.  I added patterned paper on the back of the fabric frame and onto the under side of the frame.  I added washi tape to be decorative and also to hold it in place, as I stitched it down with my sewing machine.  Then I wrote my journaling not to my daughter under that flap.  I love that it is interactive and a little surprise for her in the future, and it makes it a little more private.


The pieces of this collection are some of those colors and products that I will always reach for,
and will never get tired of using.  Despite trending styles, the versatility of these products makes
them valuable and easy to use. 
Thanks for stopping by the Blog today and wishing you and amazing day and week ahead!


SUNDAY PAPER - Come On Get Crafty October sketch

Wednesday, October 15, 2014

Good morning!  Just wanted to post this page I did last week, using the Come On Get Crafty
sketch for October.  You can find the sketch below and see the original post HERE!


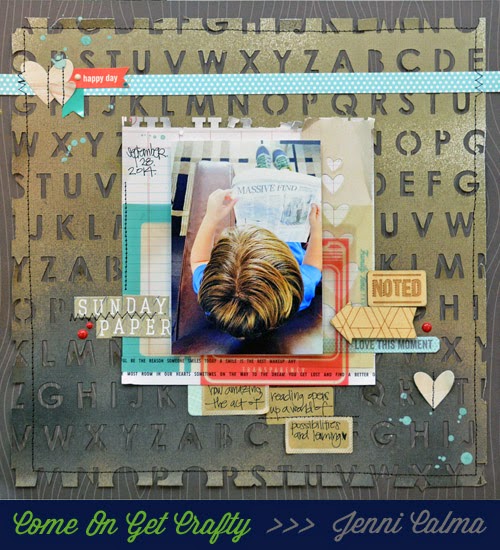
I printed out a mask/background on my Silhouette Cameo and misted it using several colors of brown.
I wanted the Woodgrain background paper to show up but still be able to read the letters as well.


I picked some other Wood Veneer pieces from Basic Grey, new to the shop and wrote my
journaling on several of the Crate Paper Kraft Stickers that are also new.


So stitching and Enamel Dots finished it up!  


Check out some of the other DT takes on the sketch and link up  your page with to the Blog for a chance to win a
$5 credit to the store!  You have until October 25th and there is some fabulous new product, so get crafty!
Have an amazing day!

RIGHT now - Scrapbook Circle Designer's Choice

Sunday, August 24, 2014

This is the page I shared on Scrapbook Circle yesterday and the last using the 'Island Paradise' kit and Add-ons from August.  I LOVE this Allison Kreft paper from Echo Park.  It is my color du jour and add some bokeh = love.


I wanted to keep as much of this paper without covering it up as possible.  It is such a beautiful design and the color is stunning.  One of my favorite reasons for buying the extra paper pack that is offered from Scrapbook Circle is for this reason.  I could use the same piece of the same paper to overlap specific pieces I punched out.


The exclusive 'happy day' stamp fit perfectly into my 1" circle punch.
I inked the edges of both the circle and heart to tie in the other colors.


After lining up the hearts I had punched from one piece with the matching piece of paper I cut,
I stitched through them on my sewing machine.  The Heidi Swapp glitter stickers add some sparkle
without taking too much away from that bokeh paper.


Thanks for checking it out!


Pinkfresh Studio August - Layouts

Wednesday, August 20, 2014

Hi everyone!  Yesterday was my monthly post for Pinkfresh Studio and these are the two 
LO's I posted.  You can find the original post on the Pinkfresh Blog HERE.

Both are using photos from our trip to Britain this summer.  I have endless photos to be scrapped and this collection of 'Vacation' wood screen printed chips were perfect for this trip.  I wanted to use
them to accent the title and theme, and also decided to use the other ones to line up along the journaling.


I watercolored a piece of paper in a soft green to lay underneath the vellum map card from Studio Calico.
I had to use the Pinkfresh Geotag veneer to point to our destination and made a tiny stitched arch
marking our journey across the Atlantic.


The 'Think Less Live More' framed stamp was appropriate for the sleeping kiddos,
in between all the delays and layovers along our trip.


My second page was using a photo of my Mom, Sofia & I in England.  It was one of the our
nights out and so for once on our trip, we weren't wearing raincoats! ;)  I am a little obsessed with
this color combination of peach and pale teal.  These coral/gold foil alphas from Pinkfresh
were the starting point of this color palette.


I stamped a couple of Pinkfresh Studio stamps onto plain tags and lined them all up with the
canvas pocket from Pinkfresh.  I ticked my journaling tag into that printed canvas pocket.
I had some pale peach crepe paper ribbon which I though would add some nice texture under
the photo and stitched through all of it.


I love this Ampersand stamp from the '& Hello' stamp set and thought the vine outlines looked
great with the lacy details in a couple stickers and the doily.  I love combining pieces from
different collections that go together like this, and sort of making up my own kit!


Thanks for stopping by today...tomorrow I will post about the cards I made and have more
posts throughout the week!  Come back and have an amazing day!

Proudly designed by Mlekoshi playground